
In today’s interconnected world, a Linux server is often the backbone of critical operations, hosting everything from websites and applications to sensitive data.
However, with great power comes great responsibility – the responsibility to secure it against an ever-growing array of cyber threats.
Leaving a Linux server unhardened is akin to leaving the doors to your digital castle wide open.
It’s not a matter of if an attack will occur, but when.
This is where Linux server hardening becomes paramount.
It’s a proactive, systematic approach to reducing vulnerabilities and strengthening your server’s security posture, ensuring its integrity, confidentiality, and availability [1].
Hardening goes beyond basic security measures; it involves meticulously configuring system settings, applying timely security patches, and disabling unnecessary services and applications.
By doing so, you significantly minimize potential attack vectors, making it far more difficult for malicious actors to gain unauthorized access or exploit weaknesses [2].
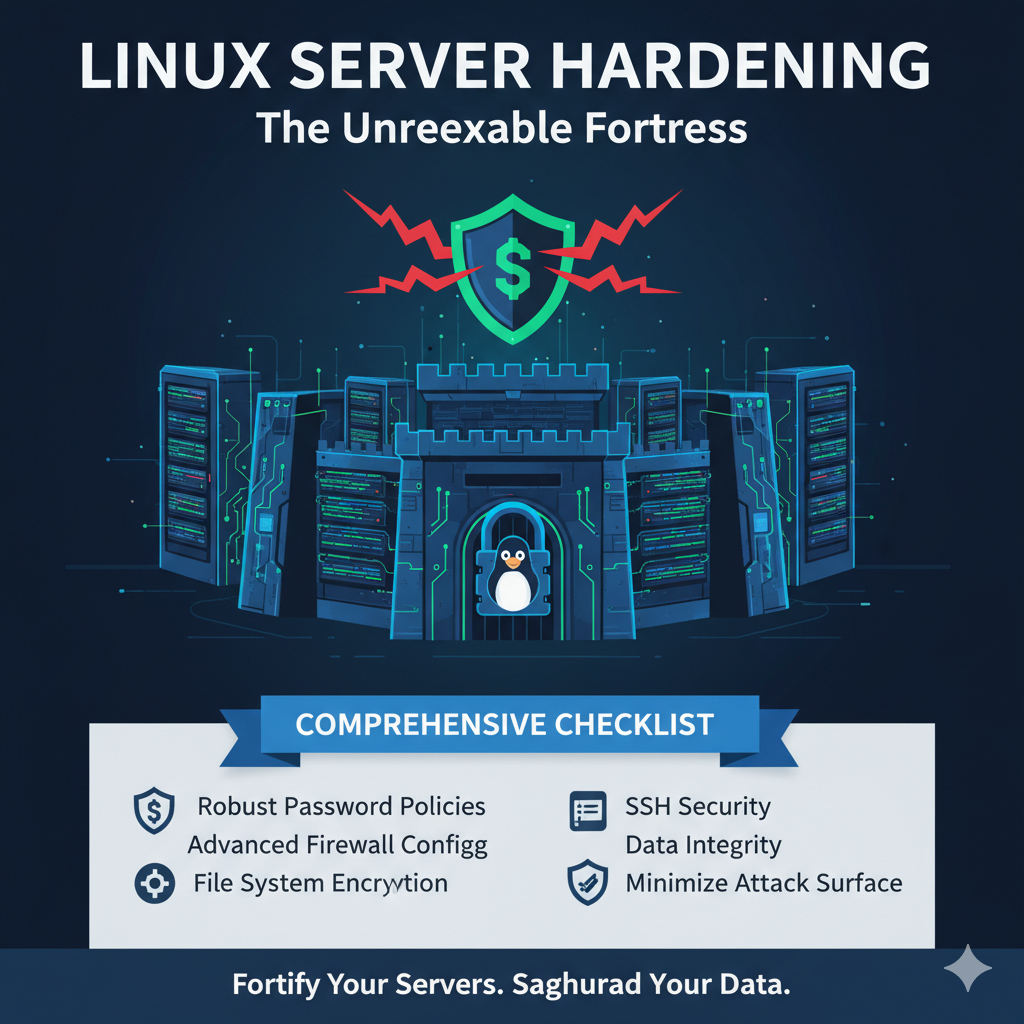
The Indispensable Benefits of a Hardened Linux Server
Investing time and effort into hardening your Linux server yields a multitude of benefits that extend far beyond just security.
It’s about creating a resilient, reliable, and trustworthy environment for your digital assets. Here are some of the critical advantages:
Enhanced Security: The most obvious benefit, hardening drastically reduces the risk of unauthorized access, data breaches, and system compromises. It’s your first line of defense against cybercriminals [2].
Reduced Attack Surface: By eliminating unnecessary components and closing unused ports, you shrink the number of potential entry points for attackers, making your server a less appealing target [2].
Improved Incident Response Effectiveness: A hardened system often includes robust logging and monitoring, which facilitates quicker detection and more effective responses to security incidents, minimizing potential damage [2].
Greater System Stability: Removing superfluous services and software reduces system complexity, minimizes potential conflicts, and often leads to a more stable and reliable operating environment [2].
Assured Data Integrity and Confidentiality: Through measures like file system encryption and stringent access controls, sensitive data remains secure, unaltered, and accessible only to authorized personnel [2].
Operational Continuity: A secure server is a resilient server. Hardening enhances your server’s ability to remain operational and functional even when faced with security challenges, ensuring business continuity [2].
Your Essential Linux Server Hardening Checklist: Actionable Steps for a Secure System
Securing a Linux server is an ongoing process that requires diligence and a structured approach.
This checklist provides actionable steps, many accompanied by common Linux commands, to help you fortify your systems.
1. Remove Unneeded Functionality: Less is More
Every piece of software, every running service, and every open port represents a potential vulnerability.
The fewer components your server runs, the smaller its attack surface.
This principle is fundamental to hardening [1, 2].
Audit and Uninstall Unnecessary Packages:
Regularly review installed software and remove anything not essential for your server’s role.
This includes development tools, unused libraries,
or applications installed by default that you don’t need.
Debian-based systems (e.g., Ubuntu): `dpkg -l` to list, `sudo apt-get remove <package-name>` to remove.
Red Hat-based systems (e.g., CentOS, Fedora): `rpm -qa` to list, `sudo yum remove <package-name>` or `sudo dnf remove <package-name>` to remove.
Disable Unused Services: Many services start automatically but might not be required. Identify and disable them.
List services:`systemctl list-units –type=service` or `service –status-all`.
Disable a service: `sudo systemctl disable <service-name>` or `sudo chkconfig <service-name> off`.
Unbind Unnecessary Network Services:
If a service doesn’t need to be accessed remotely, configure it to listen only on the loopback interface (`127.0.0.1`).
This is often done in the service’s configuration file.
Limit Kernel Module Loading: Restrict the loading of kernel modules that are not necessary for your server’s functionality by blacklisting them in `/etc/modprobe.d/` [2].
Secure Boot Configuration: Password-protect your boot loader (e.g., GRUB2) to prevent unauthorized modifications during the boot process [2].
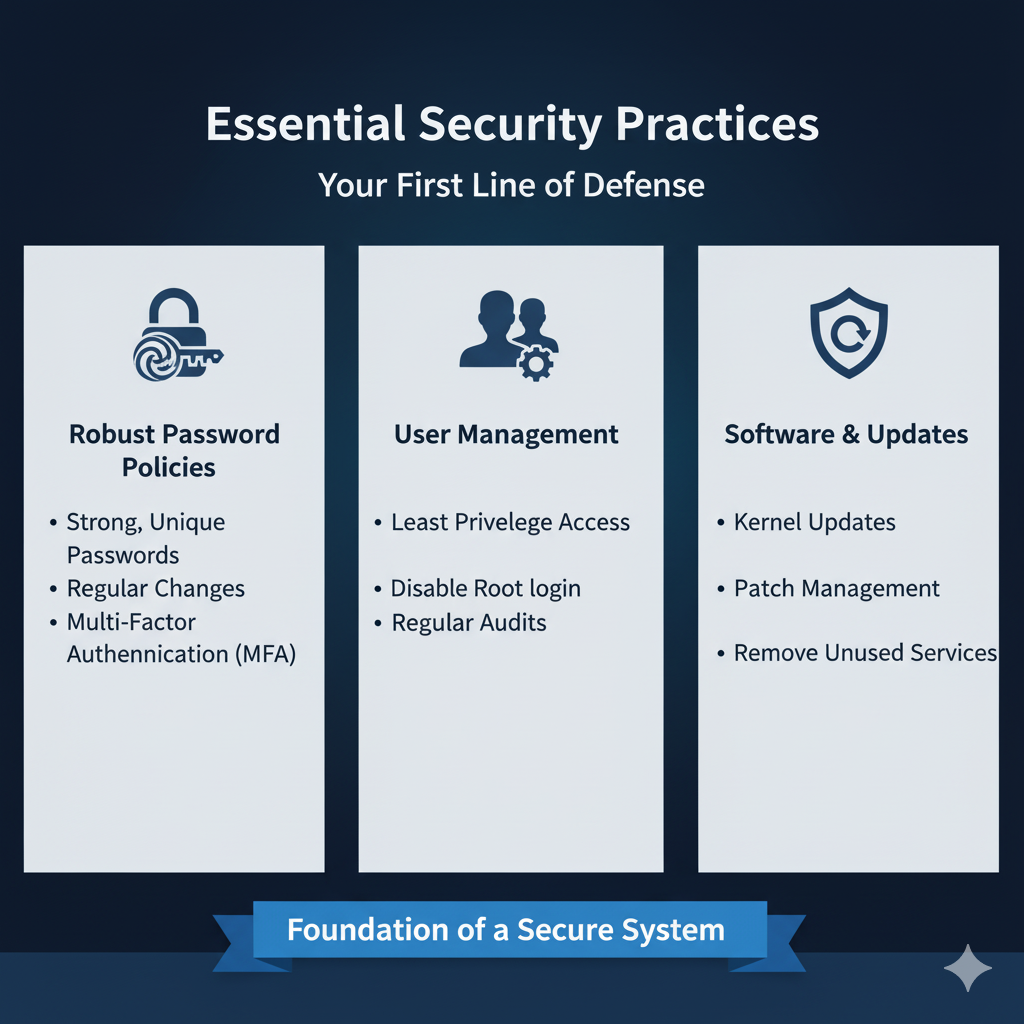
2. Patch and Update Promptly: Stay Ahead of Threats
Software vulnerabilities are discovered constantly.
Keeping your system and all installed software up-to-date with the latest security patches is one of the most critical hardening practices [1].
Enable Automatic Updates: For non-critical systems, consider enabling automatic security updates. For production environments, schedule regular updates and test them in a staging environment first.
Debian-based systems: `sudo apt update && sudo apt upgrade`
Red Hat-based systems: `sudo yum update` or `sudo dnf update`
Subscribe to Security Advisories: Stay informed about new vulnerabilities and patches relevant to your Linux distribution and installed software.
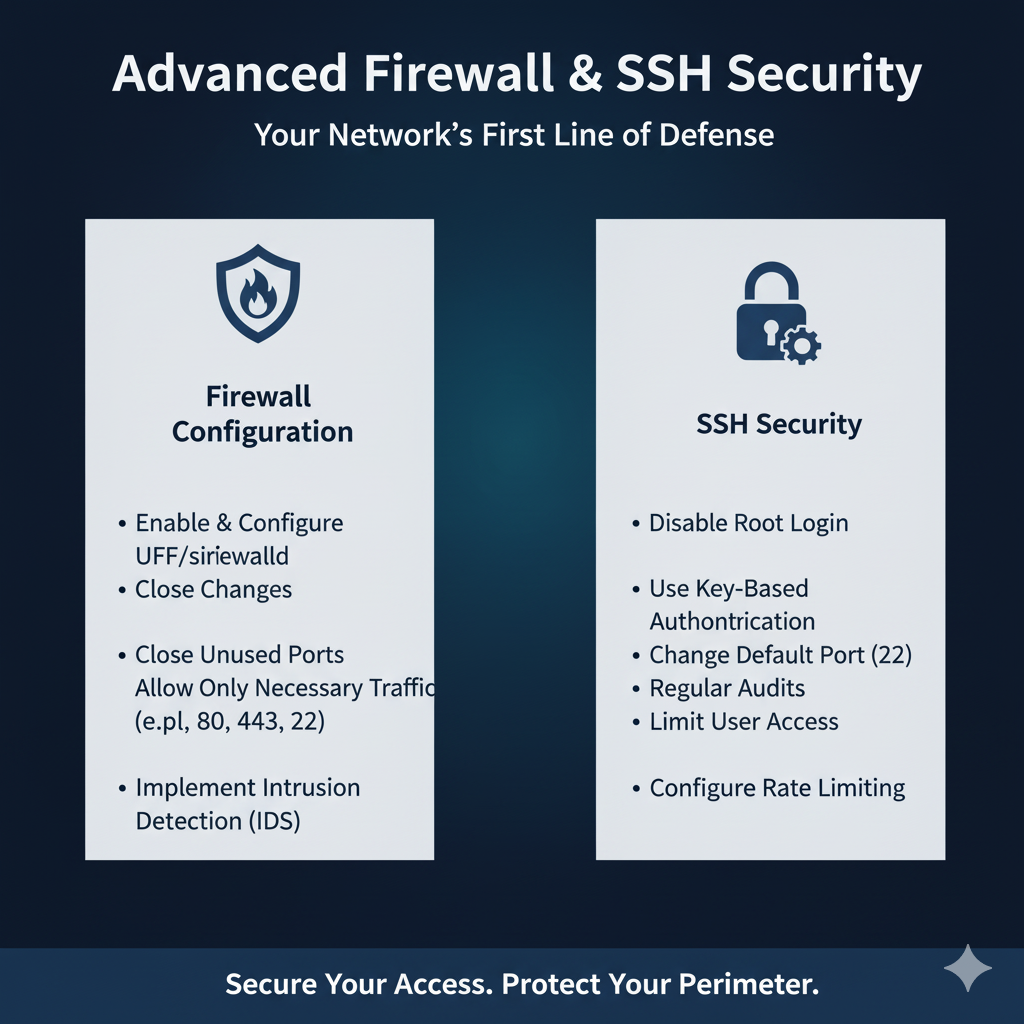
3. Minimize Open Ports and Network Vulnerabilities: Close the Gates
Your network interface is a primary entry point for attackers. Minimizing open ports and securing those that remain open is crucial for network security [2].
Conduct a Port Audit: Regularly scan your server to identify all open ports and the services listening on them.
Tools: `nmap`, `ss -tuln`.
Close Unnecessary Ports:** Disable services that are listening on ports you don’t need.
Implement a Robust Firewall: Configure a firewall (e.g., `ufw`, `iptables`, `nftables`) to explicitly allow only necessary inbound and outbound traffic, denying everything else by default.
Ensure SSH is allowed, preferably on a non-standard port.
UFW example: `sudo ufw enable`, `sudo ufw allow ssh`, `sudo ufw allow http`, `sudo ufw allow https`.
Use TCP Wrappers: For services that support them, use `/etc/hosts.allow` and `/etc/hosts.deny` to restrict access based on IP addresses or hostnames, adding an extra layer of control [2].
Isolate Sensitive Services: Run critical services in isolated environments like containers or virtual machines to limit their exposure [2].
Enable Connection Rate Limiting: Implement tools like `fail2ban` to automatically ban IP addresses that make too many failed login attempts, mitigating brute-force attacks [2].
Consider third-party DDoS protection for public-facing services.
4. Manage Password Policies and User Accounts: Strong Credentials, Secure Access
Weak passwords and poorly managed user accounts are common entry points for attackers.
Implementing strong password policies and adhering to the principle of least privilege are vital [2].
Enforce Strong Password Policies: Use PAM (Pluggable Authentication Modules) to enforce complexity requirements (length, character types), password history, and account lockout policies [3].
Example PAM configuration (`/etc/pam.d/common-password`):
“`
password required pam_cracklib.so retry=3 minlen=12 ucredit=-1 lcredit=-1 dcredit=-1 ocredit=-1
password required pam_unix.so sha512 shadow remember=10
“`
This example requires a minimum length of 12 characters, at least one uppercase, one lowercase, one digit, and one special character. It also remembers the last 10 passwords.
Implement Account Lockout: Configure `pam_tally2.so` to lock accounts after a certain number of failed login attempts.
Example PAM configuration (`/etc/pam.d/common-auth`):
“`
auth required pam_tally2.so deny=5 unlock_time=300 even_deny_root
“`
This locks an account for 5 minutes after 5 failed attempts, including root [3].
Disable Root Login: Never allow direct root login via SSH. Instead, log in as a regular user and use `sudo` for administrative tasks.
Use `sudo` Wisely: Grant `sudo` privileges only when necessary and configure it to require a password for each use. Review `/etc/sudoers` regularly.
Principle of Least Privilege: Users and services should only have the minimum necessary permissions to perform their functions.
Avoid granting excessive privileges.
Remove Default/Unused Accounts: Disable or remove any default accounts that are not in use. Ensure no accounts exist with empty passwords [2].
5. Encrypt File Systems: Protect Data at Rest
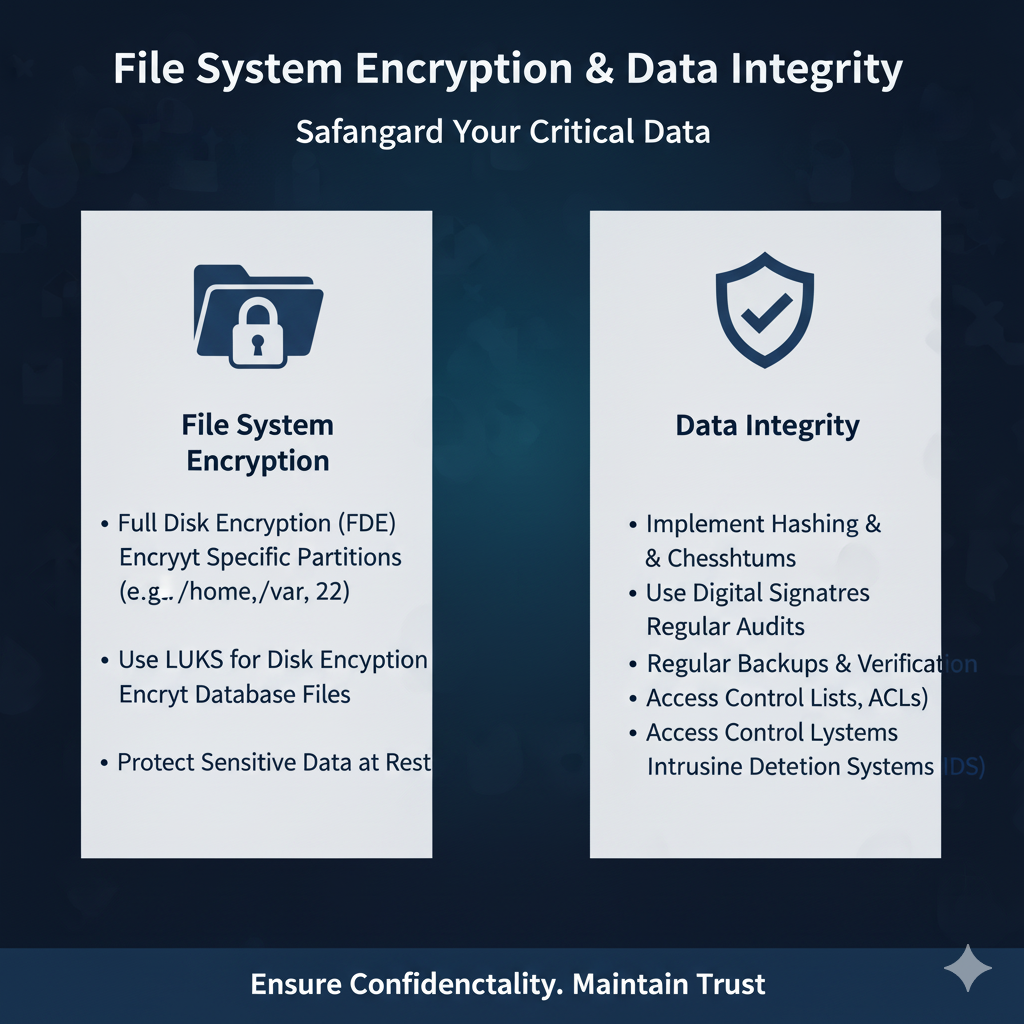
Even if an attacker gains physical access to your server’s storage, file system encryption ensures that your data remains unreadable and secure [2].
Use LUKS for Disk Encryption: Linux Unified Key Setup (LUKS) is a robust method for encrypting disk partitions. It operates at the partition level, providing full disk encryption [2].
Installation (Debian/Ubuntu): `sudo apt-get install cryptsetup`
Installation (Red Hat/CentOS):** `sudo yum install cryptsetup`
Setup (example):`sudo cryptsetup luksFormat /dev/sdX` (where `sdX` is your target partition).
Encrypt Specific Directories: For sensitive data within a non-encrypted partition, consider using tools like `eCryptfs` or `dm-crypt` to encrypt specific directories.
6. Secure SSH: Your Remote Gateway
SSH (Secure Shell) is your primary tool for remote server management, making its security paramount.
Disable Password Authentication: Rely exclusively on SSH key-based authentication. Generate strong SSH key pairs and protect your private key with a passphrase.
Generate key pair: `ssh-keygen -t rsa -b 4096`
Copy public key to server: `ssh-copy-id user@your_server_ip`
Disable password auth in `sshd_config`: Set `PasswordAuthentication no`.
Change Default SSH Port: Move SSH from its default port (22) to a high, non-standard port to deter automated scanning bots.
Edit `sshd_config`: Set `Port <your_new_port_number>`.
Limit SSH Access Restrict SSH access to specific users or IP addresses using `AllowUsers`, `AllowGroups`, or `AllowIPs` directives in `sshd_config`.
Disable X11 Forwarding: If not needed, disable X11 forwarding in `sshd_config` by setting `X11Forwarding no`.
7. Implement Robust Logging and Auditing: See Everything
Comprehensive logging and regular auditing are essential for detecting suspicious activity, troubleshooting issues, and providing forensic evidence in case of a breach [2].
Configure `rsyslog` or `systemd-journald`: Ensure system logs are properly configured to capture all relevant security events.
Use `auditd`: The Linux Audit Daemon (`auditd`) provides detailed, configurable logging of system calls and file access, crucial for security monitoring.
Centralized Log Management: Consider sending logs to a centralized log management system (e.g., ELK Stack, Splunk) for easier analysis and correlation across multiple servers.
Regular Log Review: Periodically review logs for unusual patterns, failed login attempts, or unauthorized access attempts.
8. Kernel Hardening: The Core of Your System
Hardening the Linux kernel itself provides a foundational layer of security.
Disable Unused Kernel Modules: Similar to services, unload or blacklist kernel modules that are not required.
Configure `sysctl` Parameters: Adjust kernel parameters via `/etc/sysctl.conf` to enhance security. Examples include:
* `net.ipv4.ip_forward = 0` (Disable IP forwarding if not a router)
* `net.ipv4.conf.all.accept_source_route = 0` (Disable source routing)
* `net.ipv4.conf.all.send_redirects = 0` (Disable ICMP redirects)
* `kernel.randomize_va_space = 2` (Enable Address Space Layout Randomization – ASLR)
Use SELinux or AppArmor: These mandatory access control (MAC) systems provide an additional layer of security by enforcing fine-grained access policies, even for the root user.
While complex, they are powerful tools for preventing privilege escalation and containing breaches.
SELinux (Red Hat-based):** Ensure it’s in enforcing mode.
AppArmor (Debian/Ubuntu-based):** Ensure profiles are loaded and enforced.
Conclusion: Security is a Journey, Not a Destination
Linux server hardening is not a one-time task but an ongoing commitment.
The threat landscape is constantly evolving, and so too must your security practices.
Regularly review your configurations, stay informed about new vulnerabilities, and continuously adapt your hardening strategies.
By diligently following this comprehensive checklist, you can significantly enhance the security posture of your Linux servers, protecting your valuable data and ensuring the uninterrupted operation of your services.
Remember, a secure server is a reliable server, and proactive defense is always the best offense.
References
[1] Netwrix. (n.d.). *Linux Server Hardening and Security Best Practices*. Retrieved from [
[2] Sternum IoT. (2024, September 2). *Linux Security Hardening: 19 Best Practices with Linux Commands*. Retrieved from [
[3] Baeldung on Linux. (2023, April 11). *Managing Password Complexity in Linux*.