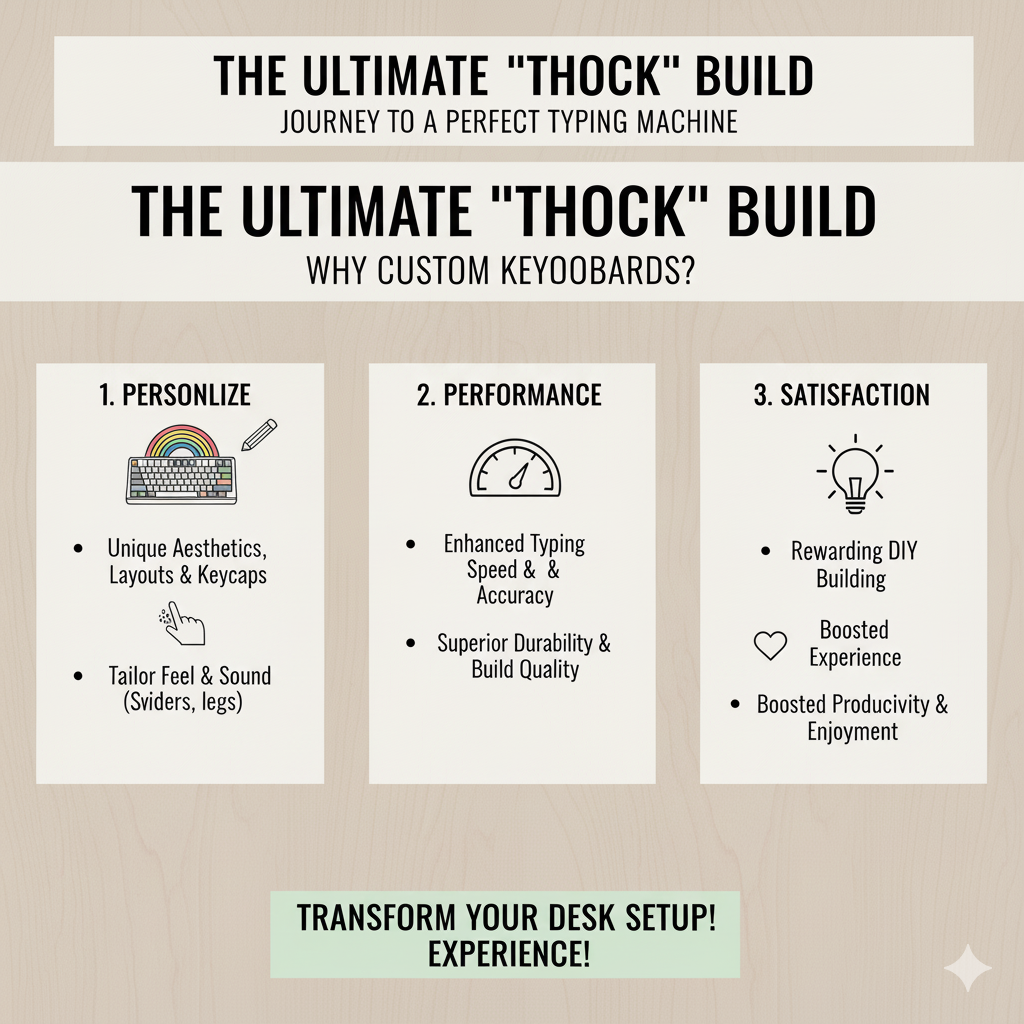
For years, I used off-the-shelf mechanical keyboards, thinking I was experiencing the best of what the hobby had to offer.
But the truth is, a custom build is an entirely different beast—a personalized instrument tuned to your exact preferences in sound, feel, and aesthetic.
This is the log of my latest journey: a quest for the ultimate “thock” using some of the most popular and value-driven components in the custom keyboard community today.
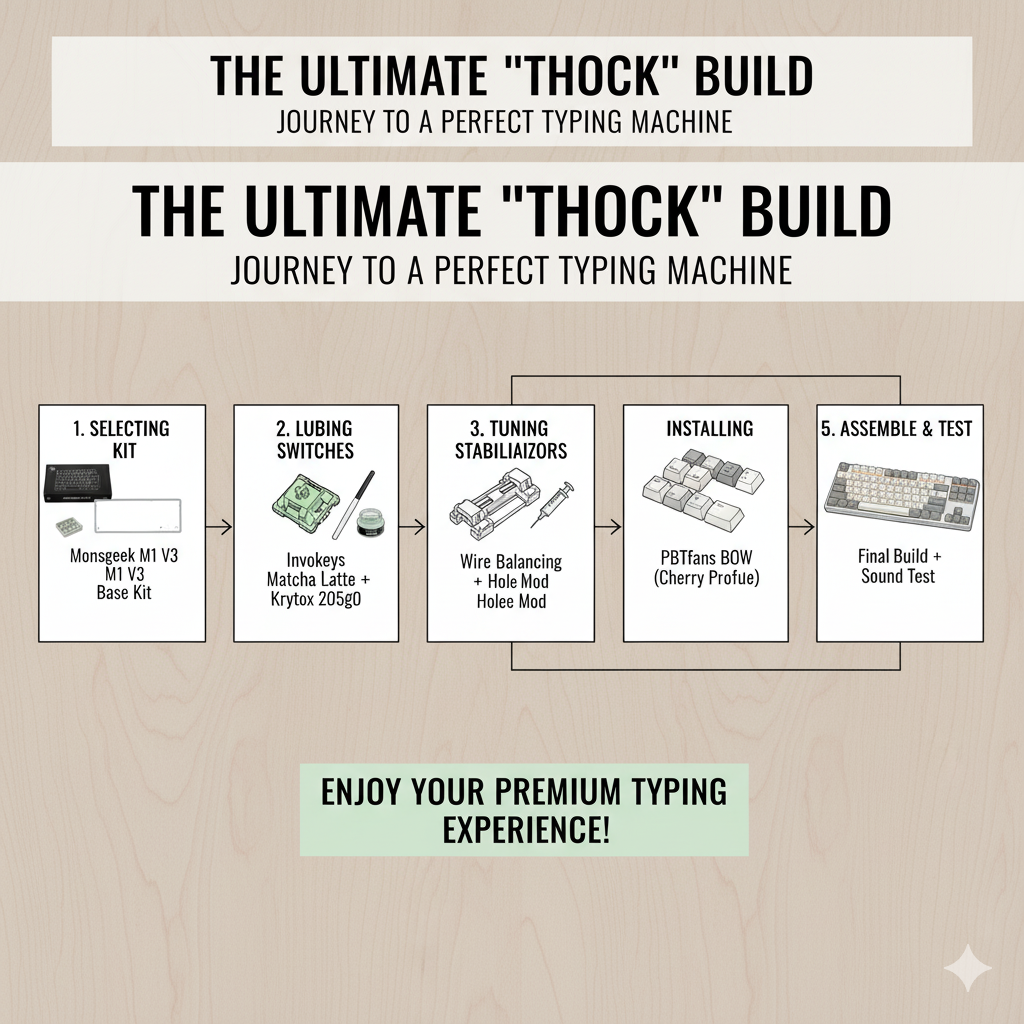
Phase 1: The Component Selection
The first and arguably most crucial step in any custom build is selecting the components.
Every part—from the case material to the switch type—contributes to the final sound profile and typing experience.
My goal for this build was a high-quality, gasket-mounted, 75% layout keyboard with a deep, satisfying sound profile, all while maintaining a reasonable budget.
Here is the final parts list that I settled on:
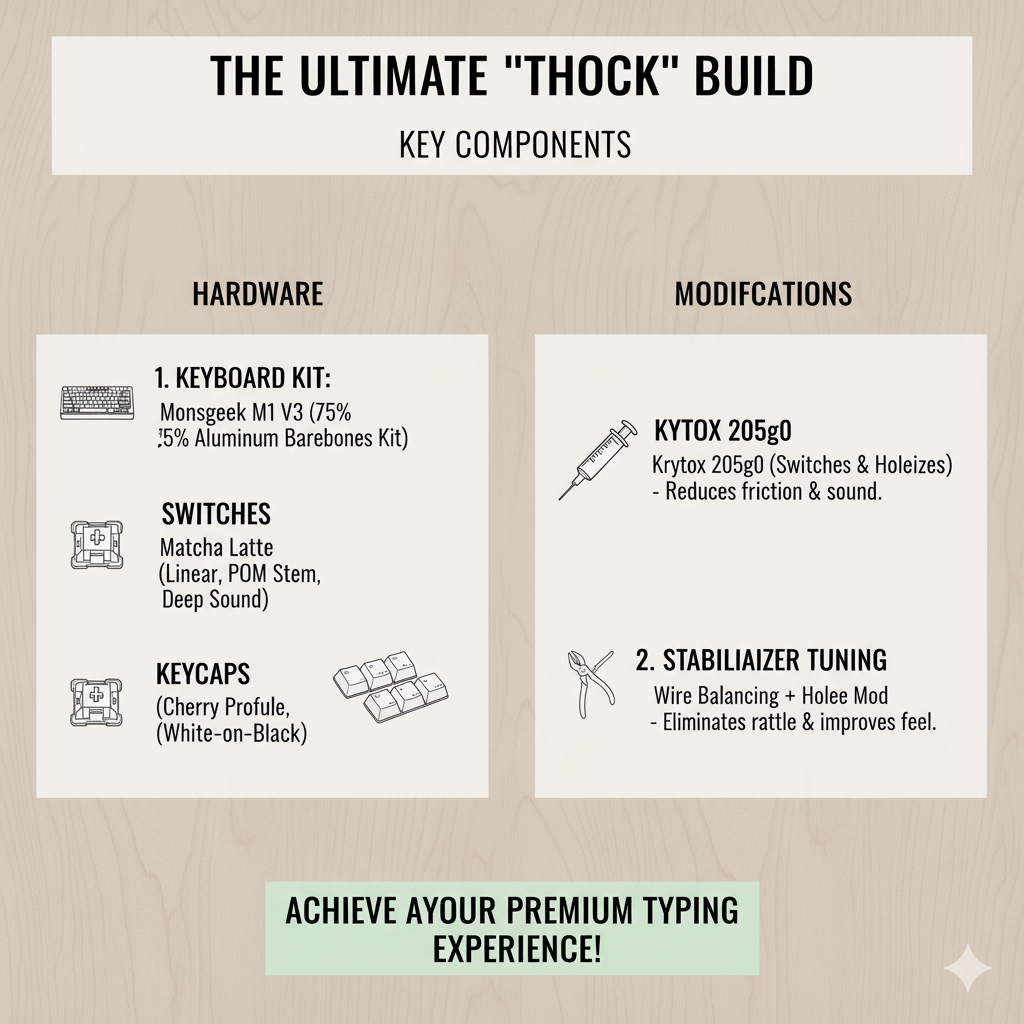
- Keyboard Kit (Case & PCB): Monsgeek M1 V3 (75% Layout, Gasket Mount, Aluminum Case)
- Switches: Invokeys Matcha Latte (Linear, POM Stem, Long Pole)
- Keycaps: PBTfans BOW (Black on White) Keycaps (Cherry Profile, PBT Plastic)
- Stabilizers: Durock V2 Screw-in Stabilizers
- Lube: Krytox GPL 205g0 (for switches and stabilizers) and Krytox GPL 105 (for switch springs)
The Monsgeek M1 V3 is a community favorite for a reason.
It offers a premium, heavy aluminum case, a gasket-mounted plate for a softer typing feel, and a south-facing PCB (important for keycap compatibility) at an entry-level price point.
The Invokeys Matcha Latte switches were chosen specifically for their long-pole stem, which creates a deeper, more pronounced bottom-out sound—the key to achieving that coveted “thock.”
Finally, the PBTfans BOW keycaps are thick, durable, and their Cherry profile is a classic choice that complements the aesthetic of the aluminum case.
Phase 2: Preparation—The Unsung Hero of the Build
A custom keyboard is not a plug-and-play device; it is a project that requires patience and meticulous preparation.
Skipping this phase is the single biggest mistake a beginner can make, as it directly impacts the final sound and feel.
Step 2.1: PCB Testing
Before assembling anything, the first step is to test the Printed Circuit Board (PCB).
This is a crucial quality control step to ensure every key switch socket is functional.
I connected the bare PCB to my computer and used a key tester software (like VIA or a simple online keyboard tester) to check every single key.
A pair of tweezers is perfect for shorting the switch contacts in each socket to simulate a key press.
Observation: All sockets registered perfectly, confirming the PCB was good to go.
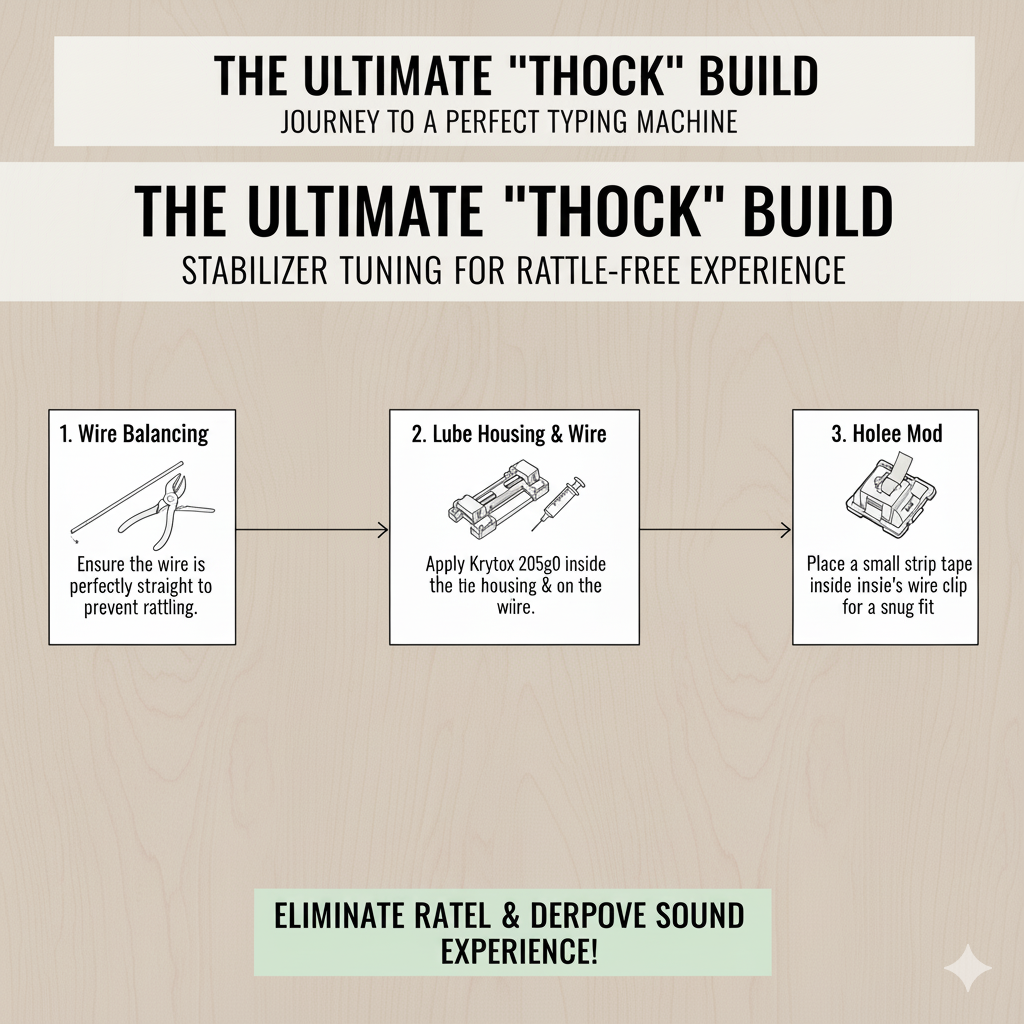
Step 2.2: Stabilizer Modding and Lubing
Stabilizers are the components that sit under the larger keys (Spacebar, Enter, Shift) and prevent them from wobbling.
Poorly tuned stabilizers are the source of most keyboard noise—the dreaded “rattle” or “tick.”
I used the highly-regarded Durock V2 screw-in stabilizers, which are known for their tight tolerances.
The process involved three key modifications:
- Clipping: The small plastic feet on the stabilizer stems were clipped off to ensure a cleaner bottom-out sound.
- Holee Mod (Optional but Recommended): A small piece of medical tape was placed inside the stabilizer housing to cushion the stem’s return, further dampening the sound.
- Lubing: The stabilizer wires and housings were generously coated with Krytox GPL 205g0.
The goal of lubing is to eliminate all plastic-on-plastic and plastic-on-metal friction, resulting in a smooth, silent press.
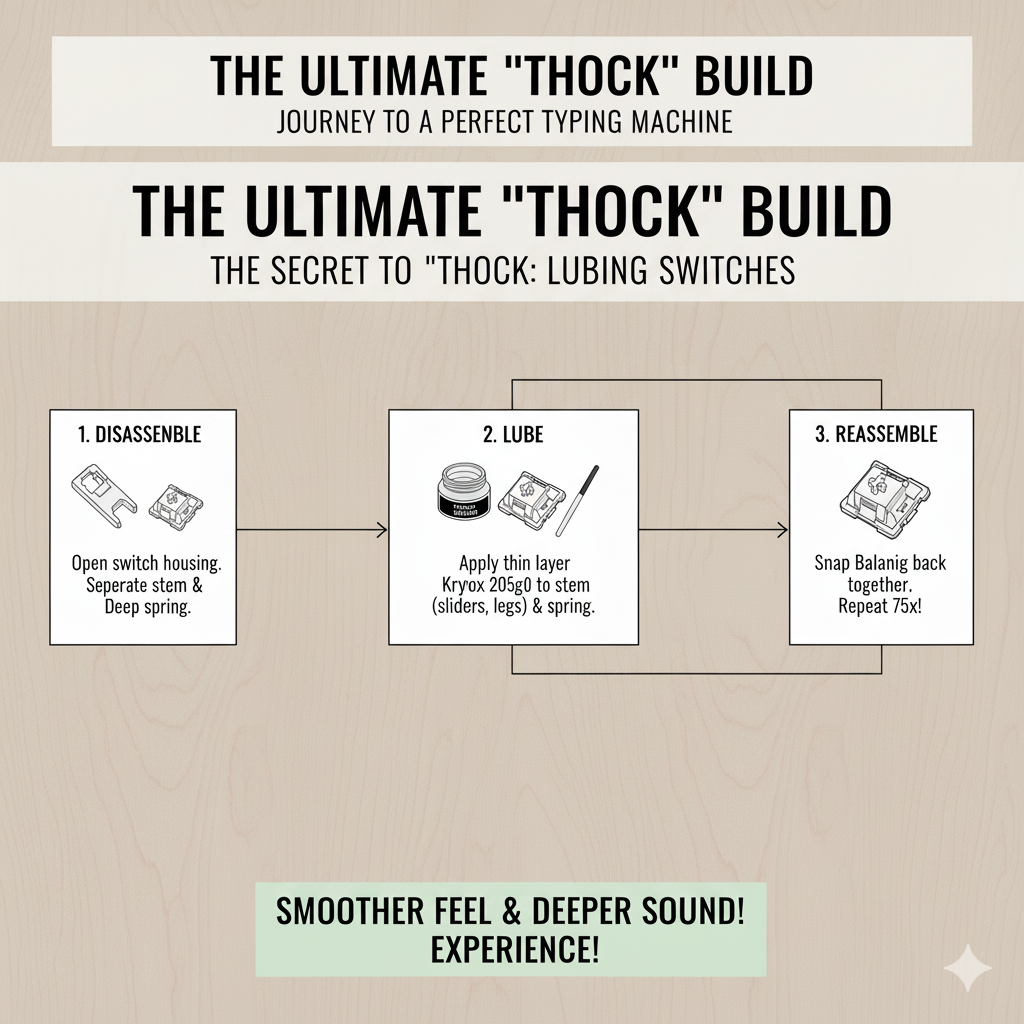
Step 2.3: Switch Lubing
This is the most time-consuming part of the build, but it is what truly elevates a custom keyboard from good to great.
Lubing the Invokeys Matcha Latte switches involved disassembling all 82 switches (for the 75% layout) and applying a thin, even coat of Krytox GPL 205g0 to the stem and the bottom housing rails.
The springs were “bag-lubed” with a lighter oil, Krytox GPL 105, which involves placing the springs in a bag with a few drops of oil and shaking them until they are coated.
This process removes the metallic “ping” sound and makes the switch action incredibly smooth.
Time Investment: This step took approximately three hours, but the result—a perfectly smooth, silent, and deep-sounding switch—was worth every minute.
Phase 3: Assembly—Bringing the Parts Together
With all the components prepped, the assembly process is relatively straightforward, especially with a hot-swappable PCB like the one in the Monsgeek M1 V3.
Step 3.1: Mounting Stabilizers and Plate
The lubed and tuned stabilizers were screwed into the PCB.
Next, the PCB was mounted onto the polycarbonate plate (the M1 V3 kit came with both a polycarbonate and a FR4 plate, but I chose polycarbonate for a softer, deeper sound).
The plate and PCB assembly was then carefully placed into the bottom case, ensuring the gasket socks were properly seated around the edges.
Step 3.2: Installing Switches
The lubed switches were then pressed into the plate and PCB assembly.
This step requires care to ensure the switch pins are perfectly straight before insertion.
A bent pin can damage the hot-swap socket, so I checked each switch twice before pressing it in.
The satisfying click of the switch seating into the socket is a small but rewarding milestone.
After all switches were installed, I performed a second, quick key test to ensure all switches were registering correctly after installation.
Step 3.3: Final Case Assembly
The Monsgeek M1 V3 comes with various layers of foam and dampening material.
I chose to use the included Poron plate foam and the case foam, but I omitted the IXPE switch pad to allow the sound to resonate more freely within the aluminum case, further enhancing the “thock.”
The top and bottom halves of the aluminum case were screwed together, and the keyboard was ready for its final touch.
Step 3.4: Keycap Installation
The final step is the most visually satisfying: installing the PBTfans BOW keycaps.
The thick PBT plastic of these keycaps is essential for the sound profile, as it contributes to a lower-pitched, less hollow sound compared to thinner ABS keycaps.
Using a keycap puller, I carefully placed each keycap onto its corresponding switch stem, ensuring the legends were correctly oriented.
The clean, minimalist aesthetic of the Black on White keycaps perfectly contrasted with the dark gray aluminum case, creating a professional and timeless look.
Phase 4: The Final Result and Sound Test
The moment of truth arrived: plugging in the finished keyboard and typing the first sentence.
The result was nothing short of spectacular.
The combination of the gasket-mounted aluminum case, the lubed long-pole switches, and the thick PBT keycaps delivered the exact sound I was chasing.
The sound is a deep, uniform, and resonant “thock” across the entire board, with zero stabilizer rattle or spring ping.
The typing feel is soft and cushioned, thanks to the gasket mount, making long typing sessions a pleasure rather than a chore.
The 75% layout is the perfect balance between compactness and functionality, retaining the essential function row and arrow keys.
Key Takeaways for Your First Custom Build
If you are considering diving into the custom keyboard hobby, here are the three most important lessons I have learned from this and previous builds:
- Preparation is Everything: Do not rush the lubing and stabilizer tuning process.
- Lube is the Secret Sauce: A $10 switch that is properly lubed will feel and sound better than a $1 switch that is not.
- Start with a Hot-Swap Kit: Soldering is a skill that can be learned later.
Kits like the Monsgeek M1 V3, NuPhy Gem80, or QK100 are excellent entry points that allow you to focus on the fun parts—the switches, keycaps, and the final sound—without the barrier of soldering.
The custom mechanical keyboard hobby is a rewarding blend of engineering, aesthetics, and personal preference.
This build log is a testament to the fact that you can achieve a truly premium, high-end typing experience with smart component choices and a little bit of elbow grease.
Happy building, and may your next keyboard be full of “thock.”
.