
There’s nothing quite like the productivity boost and enhanced viewing experience that comes with a dual-monitor setup.
Whether you’re a gamer, a designer, a coder, or simply someone who appreciates more screen real estate, an external monitor can transform your workflow.
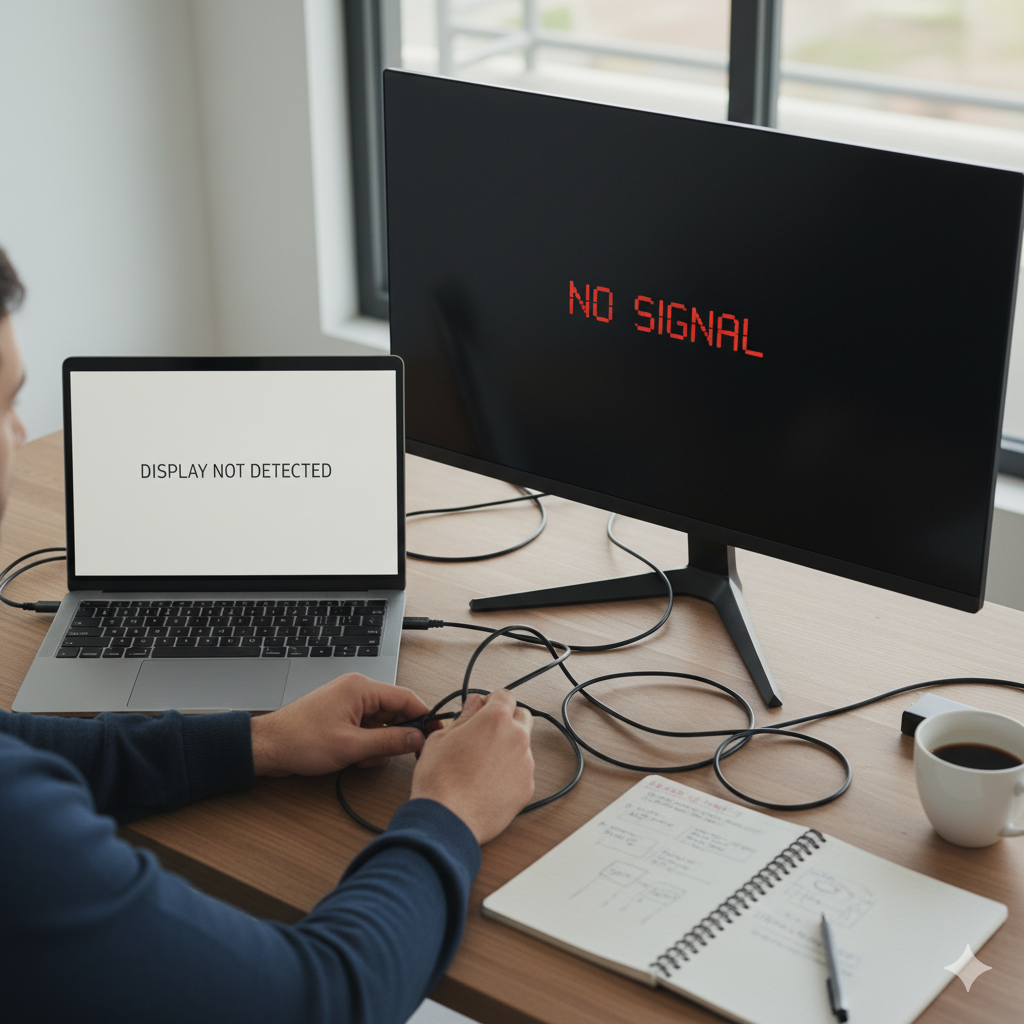
But what happens when that perfect setup suddenly decides to go on strike?
You plug in your trusty monitor, eager to dive into your tasks,
only to be met with a frustrating “No Signal” message or a completely blank screen.
Your laptop, seemingly oblivious, carries on as if nothing’s wrong.
Before you succumb to the urge to hurl your monitor (please don’t!), take a deep breath.
The “external monitor not detected” issue is incredibly common, and more often than not, it’s a fixable problem.
From simple cable woes to driver dilemmas, this comprehensive guide will walk you through the most common culprits and provide actionable, step-by-step solutions to get your dual-screen dream back on track.
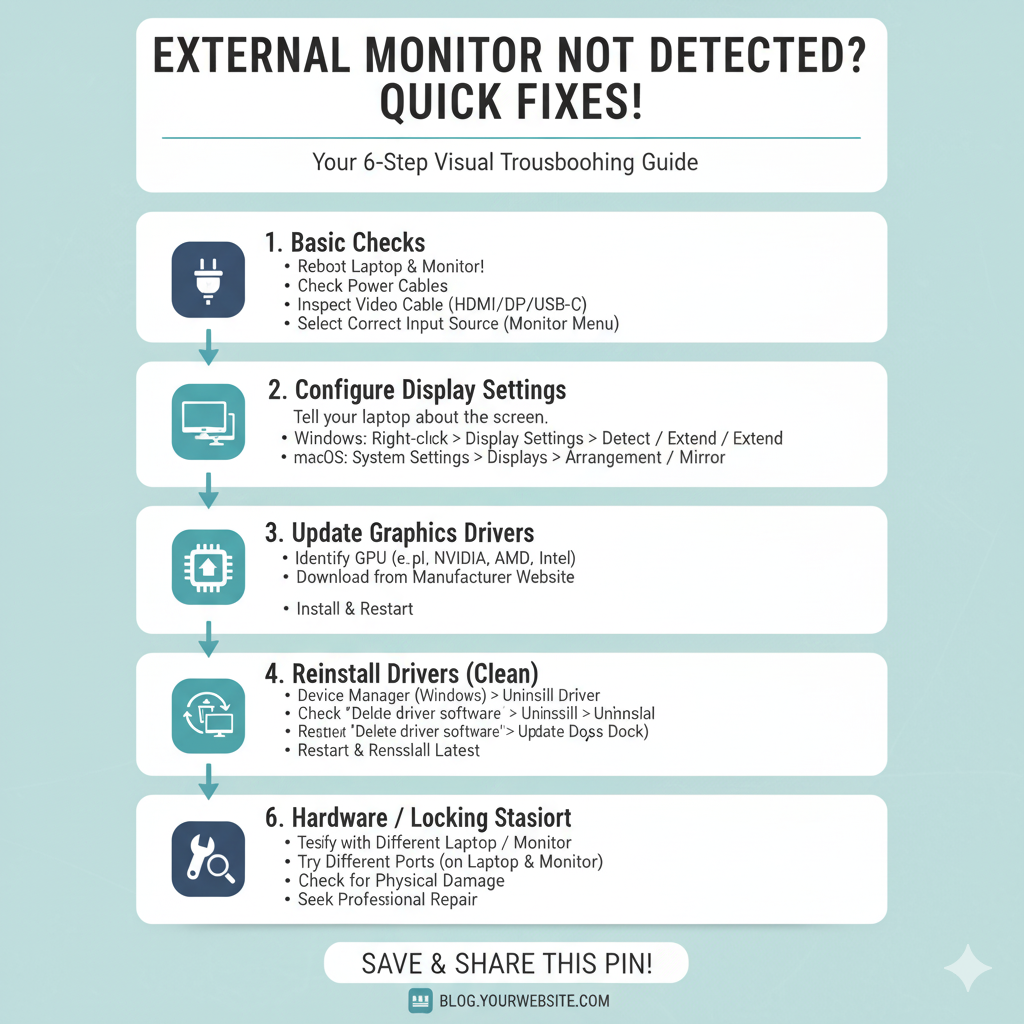
The Foundation: Basic Checks You Should Always Start With
It might seem obvious, but many technical issues are resolved by the simplest of checks. Don’t skip these!
Reboot Everything: It’s the classic IT solution for a reason.
Turn off your laptop, turn off your monitor, unplug both, wait 30 seconds, then plug them back in and restart.
This can often clear temporary glitches.
Check Power Connections: Ensure both your laptop’s power adapter and your external monitor’s power cable are securely plugged into working power outlets.
Test the outlet with another device if you’re unsure.
Videos are added as random thoughts 💭 💭…
Inspect Video Cables:
Secure Connection: Is the video cable (HDMI, DisplayPort, USB-C, DVI, VGA) firmly seated at both ends – your laptop and your monitor?
Give them a gentle wiggle to ensure they haven’t come loose.
Cable Integrity: Look for any visible damage to the cable. Kinks, cuts, or bent pins can render a cable useless.
If you have a spare, try swapping it out. Faulty cables are a surprisingly common cause of this issue.
Correct Port: Are you using the correct input port on your monitor? Monitors often have multiple ports (e.g., HDMI 1, HDMI 2, DisplayPort).
Make sure your monitor is set to the correct input source.
Monitor Input Source: On your external monitor, use the physical buttons to access its On-Screen Display (OSD) menu.
Navigate to the “Input,” “Source,” or “Signal” setting and manually select the correct input (e.g., HDMI 1, DisplayPort).
Sometimes, monitors don’t auto-detect the signal.
Diving Deeper: Software and Driver Solutions
If the basic checks didn’t do the trick, it’s time to delve into your laptop’s settings and drivers.
1. Configure Display Settings (Windows)
Windows often needs a little nudge to recognize new displays.
Access Display Settings: Right-click on an empty area of your desktop and select “Display settings.”
Detect Displays: Scroll down and look for the “Multiple displays” section. Click the “Detect” button.
Identify Displays: If your monitor is detected, click “Identify” to see which number corresponds to which screen.
Arrangement and Mode:
Arrangement: Drag and drop the display icons to match their physical arrangement on your desk.
Multiple Displays Dropdown: Use the dropdown menu to choose how you want the displays to behave:
Duplicate these displays: Shows the same content on both screens.
Extend these displays: Treats both screens as one continuous desktop (most common and productive).
Show only on 1 / Show only on 2: Disables one display.
Resolution: Ensure the external monitor is set to its native (recommended) resolution for the best picture quality.
2. Configure Display Settings (macOS)
Mac users have a slightly different, but equally straightforward, process.
Access Display Settings: Go to the Apple menu (top-left corner) > “System Settings” (or “System Preferences” on older macOS versions) > “Displays.”
Arrangement (for Extended Displays): If your monitor is detected,
you’ll see a visual representation of your displays. Click “Arrangement.”
Drag and drop the blue boxes to match your physical setup. You can also drag the white bar (menu bar) to the display you want as your primary.
Mirror Displays: If you want to duplicate your screen, select “Mirror Displays.” For an extended desktop, ensure this option is unchecked.
Resolution: Select the “Default for display” or choose a scaled resolution that looks best.
3. Update Graphics Drivers
Outdated or corrupted graphics drivers are a notorious cause of display detection issues.
Identify Your Graphics Card:
Windows: Press Win + R, type dxdiag, and press Enter. Go to the “Display” tab to see your graphics card model (e.g., NVIDIA GeForce, AMD Radeon, Intel Iris/HD Graphics).
macOS: Go to the Apple menu > “About This Mac” > “System Report” > “Graphics/Displays.”
Download Latest Drivers:
NVIDIA/AMD: Go directly to the NVIDIA or AMD website, select your specific graphics card model, and download the latest drivers.
Intel: Visit the Intel Support website and use their driver utility or search for drivers specific to your CPU’s integrated graphics.
Laptop Manufacturer: For highly customized drivers, sometimes it’s best to visit your laptop manufacturer’s (e.g., Dell, HP, Lenovo, Asus, Acer, MSI, Razer) support website and download the display drivers for your specific laptop model.
Install Drivers: Run the downloaded installer.
It’s often recommended to perform a “clean installation” if the option is available, as this removes old driver files that might be causing conflicts.
Restart: Always restart your laptop after updating drivers.
4. Reinstall Graphics Drivers (Clean Installation)
If a simple update doesn’t work, a clean reinstall might be necessary.
Windows:
Press Win + X and select “Device Manager.”
Expand “Display adapters.”
Right-click on your graphics card and select “Uninstall device.”
Check the box that says “Delete the driver software for this device” (if available) and click “Uninstall.”
Restart your computer. Windows will often reinstall a generic driver, or you can then install the latest drivers you downloaded.
macOS: macOS handles drivers differently. Generally, driver updates are part of system updates. If you suspect a driver issue, ensuring your macOS is fully up to date is the primary step.
Advanced Troubleshooting and Less Common Scenarios
Still no luck? Let’s explore some less common but equally frustrating scenarios.
1. BIOS/UEFI Settings (PC Users)
Sometimes, settings in your laptop’s BIOS/UEFI can interfere.
Access BIOS/UEFI: Restart your laptop and repeatedly press the designated key (often F2, F10, F12, DEL, or ESC) to enter the BIOS/UEFI setup.
Integrated Graphics: Look for settings related to integrated graphics, discrete graphics, or multiple displays.
Ensure that options that might disable an external output aren’t enabled.
For laptops with both integrated and dedicated graphics, sometimes manually selecting “Switchable Graphics” or ensuring the dedicated GPU is active for display output can help.
Be cautious when changing BIOS settings, and only modify what you understand.
2. USB-C/Thunderbolt Specific Issues
If you’re using a USB-C or Thunderbolt port for video output, there are a few extra considerations:
Port Capability: Not all USB-C ports support “DisplayPort Alternate Mode” (Alt Mode) for video output. Check your laptop’s specifications to confirm your USB-C port is capable of video output.
Cable Quality: USB-C to HDMI/DisplayPort cables and adapters vary wildly in quality.
A cheap or uncertified cable might not transmit video reliably. Try a different, reputable brand of cable or adapter.
Docking Station/Hub Issues: If you’re using a docking station or hub, the issue might be with the dock itself.
Try connecting the monitor directly to your laptop if possible.
Ensure the docking station has sufficient power and that its drivers/firmware are up to date.
Try unplugging and replugging the dock from your laptop.
3. Monitor Firmware
While less common, some advanced monitors have firmware that can be updated.
Check your monitor manufacturer’s support page for any available firmware updates.
4. Hardware Failure
In the worst-case scenario, there could be a hardware failure:
Laptop Video Port: The video output port on your laptop could be damaged. Try a different port if available (e.g., if you have both HDMI and DisplayPort).
Monitor Input Port: The input port on your monitor might be faulty. Try a different input on the monitor if it has multiple (e.g., switch from HDMI 1 to HDMI 2).
Graphics Card Failure: Though less likely, a failing integrated or dedicated graphics card could be the cause.
This usually comes with other symptoms like graphical glitches on your laptop screen.
When to Seek Professional Help
If you’ve meticulously followed all these steps and your external monitor still remains undetected, it might be time to call in the cavalry. Consider:
Testing with a Different Laptop/Monitor: If you have access, try connecting your external monitor to a different laptop, or a different external monitor to your current laptop.
This helps pinpoint whether the issue is with your monitor, your laptop, or the cable.
They have specialized diagnostic tools and expertise to identify hardware faults.
Conclusion:
Reclaiming Your Dual-Screen Productivity
The “external monitor not detected” problem can be a real productivity killer, but with a systematic approach, it’s usually solvable.
Start with the basics – cables, power, and input sources – and then move on to software settings and driver updates.
By methodically working through these troubleshooting steps, you’ll likely have your external monitor up and running, bringing that glorious dual-screen efficiency back to your workspace.
Happy multi-tasking!